Getting Started
Spring AI Playground ships through three runtimes that all boot the same Spring Boot application: a Vaadin UI on http://localhost:8282 and a built-in streamable-http MCP server in the same process. Pick the path that matches your situation, install, then return here for the post-install steps below.
Pick your install path
| Path | Best for | Bundled | Java toolchain |
|---|---|---|---|
| Desktop App (recommended) | First-time users; anyone who wants a one-click installer with a configuration editor, OS-encrypted secret storage, and a built-in Ollama model manager | Electron launcher + JVM + Spring Boot fat JAR | not required (bundled) |
| Docker | Containerised deployments; users who already run Docker; quick MCP stdio setup for Claude Desktop without installing Java | Spring Boot fat JAR + JVM in the published container image | not required |
| From Source | Developers modifying the codebase; Java users who want fat-JAR portability and full GraalVM speed for the JS sandbox | nothing - you build it | Java 21+ (GraalVM recommended) |
The desktop installer is the recommended default. Docker and direct source execution are equally supported alternatives - same product, same UI, same MCP server.
Install at a glance
Quick start for each path; full details in the linked pages.
Desktop installer
Pick your platform installer from the Home page download badges, or browse the Releases page directly. The package wraps the launcher and the Spring Boot runtime - no Docker or Maven required.
First-launch reputation warnings are common; if you trust the release source:
- macOS - Gatekeeper may block the DMG and the first app launch. Open System Settings > Privacy & Security and click Open Anyway in both places. Quarantine fallback if the app still refuses to open:
xattr -dr com.apple.quarantine "/Applications/Spring AI Playground.app". - Windows - Microsoft Defender SmartScreen may flag the installer with "Windows protected your PC". Click More info → Run anyway.
- Linux -
.deb/.rpminstall with standard package confirmation; reputation warnings are uncommon.
Full platform notes, configuration walkthrough, MCP tools curation, and Ollama model manager: Desktop App.
Docker container
docker run -d -p 8282:8282 \
  -e SPRING_AI_OLLAMA_BASE_URL=http://host.docker.internal:11434 \
  -v spring-ai-playground:/root \
  ghcr.io/spring-ai-community/spring-ai-playground:latest
The container ships with Vaadin UI + streamable-http MCP on port 8282 by default. Add -e SPRING_PROFILES_INCLUDE=mcp-stdio for MCP stdio integration with Claude Desktop or Claude Code (the web UI keeps booting alongside).
Full options (volume layout, host networking, OpenAI switching, Claude Desktop config): Alternative Runtimes → Docker.
Local source clone
git clone https://github.com/spring-ai-community/spring-ai-playground.git
cd spring-ai-playground
./mvnw clean install -Pproduction -DskipTests=true
./mvnw spring-boot:run
Requires Java 21+ (GraalVM recommended for full-speed JS sandbox). The Vaadin UI opens at http://localhost:8282. A published fat JAR is also available alongside the desktop installers on the Releases page - handy for java -jar deployments without a source clone.
Full options (fat JAR, mcp-stdio profile, Claude Desktop config): Alternative Runtimes → From Source.
Your First Five Tasks
Once Spring AI Playground is running through any of the three paths above, the Home screen shows a live checklist that mirrors the path below. Each item self-checks based on workspace state, so you can walk through them at your own pace.
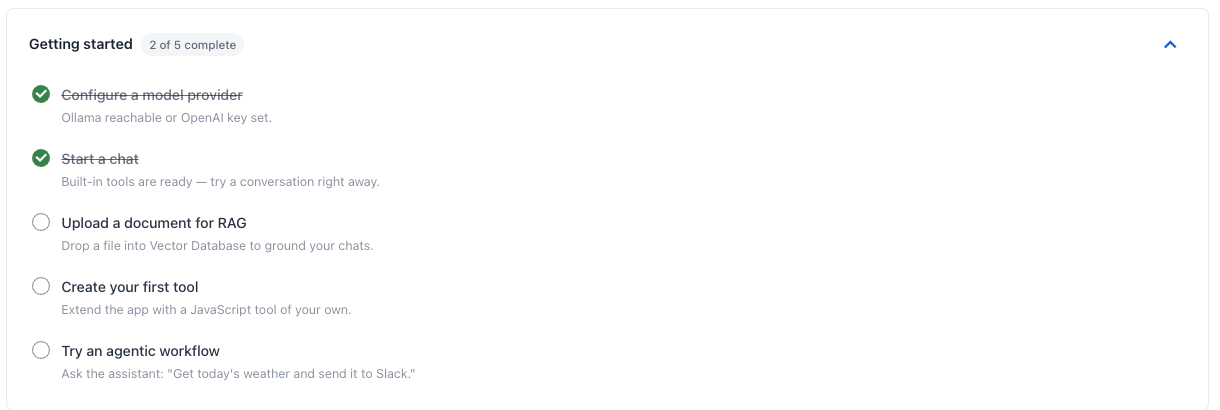
- Configure a model provider - Pick Ollama (default, local) or OpenAI. The provider pill on Home shows a green dot and "Ready" once the base URL is reachable (Ollama) or an API key is set (OpenAI). A red dot means the app cannot reach your provider - recheck the launcher config or env vars.
- Start a chat - Agentic Chat is ready the moment a provider is connected. The app ships with the Starter 5 tools exposed by default (
getCurrentTime,getWeather,searchWikipedia,extractPageContent,evalExpression) and a wider 88-tool bundled catalog you can opt into through Tool Studio's Built-in MCP Server Native Tools drawer (or the launcher's Default MCP Tools card), so you can test end-to-end without writing any code. - Upload a document for RAG - Drop a PDF or text file into the Vector Database surface. The file is chunked, embedded, and indexed on the spot; retrieval becomes available inside chat immediately.
- Create your first tool - Open Tool Studio, write a small JavaScript function, and define its sample arguments. A new tool starts as a Draft - invisible to MCP and to chat. Run it locally: if the test passes, it earns its Local Pass and is added live to the built-in MCP server the same moment. No restart, no redeploy. Agentic Chat picks it up immediately.
- Try an agentic workflow - Ask the assistant: "Use the weather tool for Seoul, then summarize what
searchWikipediareturns about that city." This exercises two Starter 5 tools in sequence and shows the full agentic path (plan → call tool → read result → call next tool → reply).
Verifying your provider: the Home provider pill is the fastest sanity check. If it is stuck on "Checking..." or flips to red, open the desktop launcher startup card or run
curl $OLLAMA_BASE_URLbefore proceeding.
Built-in MCP Endpoint
No matter whether you run the app through the desktop launcher, Docker, or direct source execution, the built-in MCP endpoint is exposed at:
http://localhost:8282/mcp
That endpoint is central to Tool Studio, MCP Inspector, and Agentic Chat with tools.
External MCP Catalog
Beyond the built-in server, the app ships a preset catalog of 57 MCP server connections that appear in the MCP Server sidebar's Inactive MCP section - clicking an entry pre-fills the configuration form with the right transport, URL or stdio command, OAuth defaults, and ${ENV_VAR} placeholders, so the easiest first external connection is a one-click activation. The catalog spans mail / calendar / chat / project trackers / code hosting / search / cloud / databases / payments / CRM / design plus two reference test servers (MCP Everything, DeepWiki). See the MCP Catalog directory for the per-category browse and MCP Server → Catalog & Sidebar Filtering for the sidebar mechanics.
Backend prerequisites
These prerequisites apply only when you choose a specific backend or runtime. The desktop installer already bundles the JVM and Spring Boot fat JAR, so no extra setup is needed just to install and open Spring AI Playground.
If You Use Ollama
Use this setup when you want the default local-first chat and embedding flow.
- Download and install Ollama on your machine.
- Run
ollama serveor ensure the Ollama app is running. - For prerequisite details, see the Spring AI Ollama Chat Prerequisites.
Recommended models to pre-pull:
ollama pull qwen3.5
ollama pull gemma4
ollama pull qwen3-embedding:0.6b
qwen3.5 is the recommended chat model for tool-calling and the Tutorials. Pull gemma4 as well if you want a stronger natural-language alternative for longer tool chains.
If You Use OpenAI Instead of Ollama
If you switch to the OpenAI setting, Ollama is not required at startup. In that case, provide OPENAI_API_KEY in the desktop app's Environment Variables section (or as an env var to the Docker / source launch) and activate the OpenAI setting / profile.
For OpenAI-Compatible settings, whether Ollama is still required depends on the selected backend and whether embeddings still use Ollama.
The actual launch command for OpenAI depends on your install path - see External Connections -> Connect model providers.
Model Configuration
Spring AI Playground is provider-agnostic with a local-first Ollama default (no API key needed). Choosing Ollama models, switching to OpenAI, and connecting OpenAI-compatible servers (LM Studio, vLLM, llama.cpp, TabbyAPI) are all covered on the External Connections -> Connect model providers page.
Verify Your Download
Each release ships with two integrity guarantees. Verifying is optional, but recommended for production use.
Replace <VERSION> in the commands below with the version printed in the installer filename you downloaded (for example 0.2.0-M7). On this page, JavaScript substitutes the latest release version automatically when GitHub is reachable.
1. SHA-256 checksum
Every installer has a matching .sha256 file in the release assets. Compare the hash of your downloaded file with the contents of that file.
macOS / Linux:
shasum -a 256 -c spring-ai-playground-<VERSION>-mac-arm64.dmg.sha256
Windows (PowerShell):
Get-FileHash spring-ai-playground-<VERSION>-win-x64.exe -Algorithm SHA256
# then compare the value with the one inside the .sha256 file
2. Sigstore build provenance (SLSA)
Every installer is signed at build time by the official GitHub Actions release workflow using a short-lived Sigstore key, and the attestation is recorded in the public transparency log. The GitHub CLI can verify the file came from this repo's release workflow:
gh attestation verify spring-ai-playground-<VERSION>-mac-arm64.dmg \
  --owner spring-ai-community
A successful verification proves the file was produced by this project's release workflow and was not modified after build.
PWA Installation
If you are running the browser-based version instead of the desktop installer, Spring AI Playground can also be installed as a Progressive Web App.
Complete either the Docker or local source setup first so the app is already available in the browser.
- Open the application in your browser at
http://localhost:8282. - Install it using the browser install prompt or the install option shown on the home page.
- Complete the installation flow to add it as an app-like experience.
Anonymous Usage Telemetry
The official build sends anonymous usage data (page views, app surface, device/browser info) to help prioritize features. IPs are anonymized by Google. The same opt-out switch applies to both the web app and every desktop launcher window (splash, server-splash, config editor, Ollama manager).
To opt out, set SPRING_AI_PLAYGROUND_TELEMETRY_ENABLED=false before launching:
- Server / Docker /
mvn: export the env var in your shell - Desktop launcher: set it in your OS environment or launcher env config before starting the app - the launcher forwards it to every window and to the bundled Spring process
- From source / IDE: pass
-Dspring.ai.playground.telemetry.enabled=falseas a JVM arg
For more details, see the README and the Configuration reference → Telemetry.
Next Step
After the app is running and the model backend is configured:
- read Features to understand the product structure
- follow Tutorials to create tools, connect MCP servers, register knowledge, and run Agentic Chat with tools and RAG
Further Reading
- Overview: see the product positioning, quick start path, and documentation map
- Desktop App: detailed install + Configuration Walkthrough for the recommended path
- Alternative Runtimes: Docker container and direct source / fat-JAR execution
- Configuration: every property / environment variable / default, and how to set it from the app, Docker, or source
- Architecture: runtime layers, data flows, and extension points
- Features: the main product areas and what they do
- Tutorials: follow end-to-end workflows for tools, MCP, vector search, and agentic chat