Tutorial 14 - Attach and Analyze Images
Time 8 min · Difficulty ★☆☆ · Surfaces Agentic Chat
Goal
Hand the model pictures and ask about them. You attach images with the picture button (or drag-drop, or paste), send a question, and a vision-capable model answers from the actual pixels - resized and EXIF-tagged in your browser, stored content-addressed on your machine, never sent to a third party. Then you go past the pixels: with the Image analyst preset the agent reads each photo's stored EXIF, tabulates capture time, camera, and GPS with renderTable, and plots where the shots were taken on a plotPointsOnMap card. Finally you re-summon an image in a later turn with the describeImage tool.
Before you start
Pick a model that can actually see. On Ollama that means a standard GGUF vision model such as qwen3.5:4b (the shipped default) or gemma3 - not an -mlx variant, which advertises vision without shipping vision tensors (the playground warns you if you try). On Apple Silicon the model list keeps the standard GGUF builds alongside the -mlx catalog exactly for this - pick qwen3.5:4b from the list, or type any custom name into the model box. OpenAI GPT-5 family models work out of the box. See Multimodal Vision Input for the capability check details.
Steps
- Open Agentic Chat and click the picture icon in the prompt field (or drop image files onto it, or paste a screenshot). Each image appears as a chip above the prompt - attach several at once (up to 5 per message, the chip bar counts them), and remove any with its x button.
 The chips are your pre-send staging area - here three vacation photos, counter at 3 / 5. Each image is already optimized (resized to at most 2048px, EXIF captured from the original) and stored locally, but nothing has gone to the model yet.
-
Type a question about the image - for example
What is this image? Read the title text and tell me what the map at the bottom shows.- and send. The image rides along with your message as native multimodal input, and the thumbnail renders inside your message bubble. -
The vision model answers from the pixels. With a local Ollama model the first image turn can take a minute or two (the vision projector loads and the image is encoded) - later turns are faster.
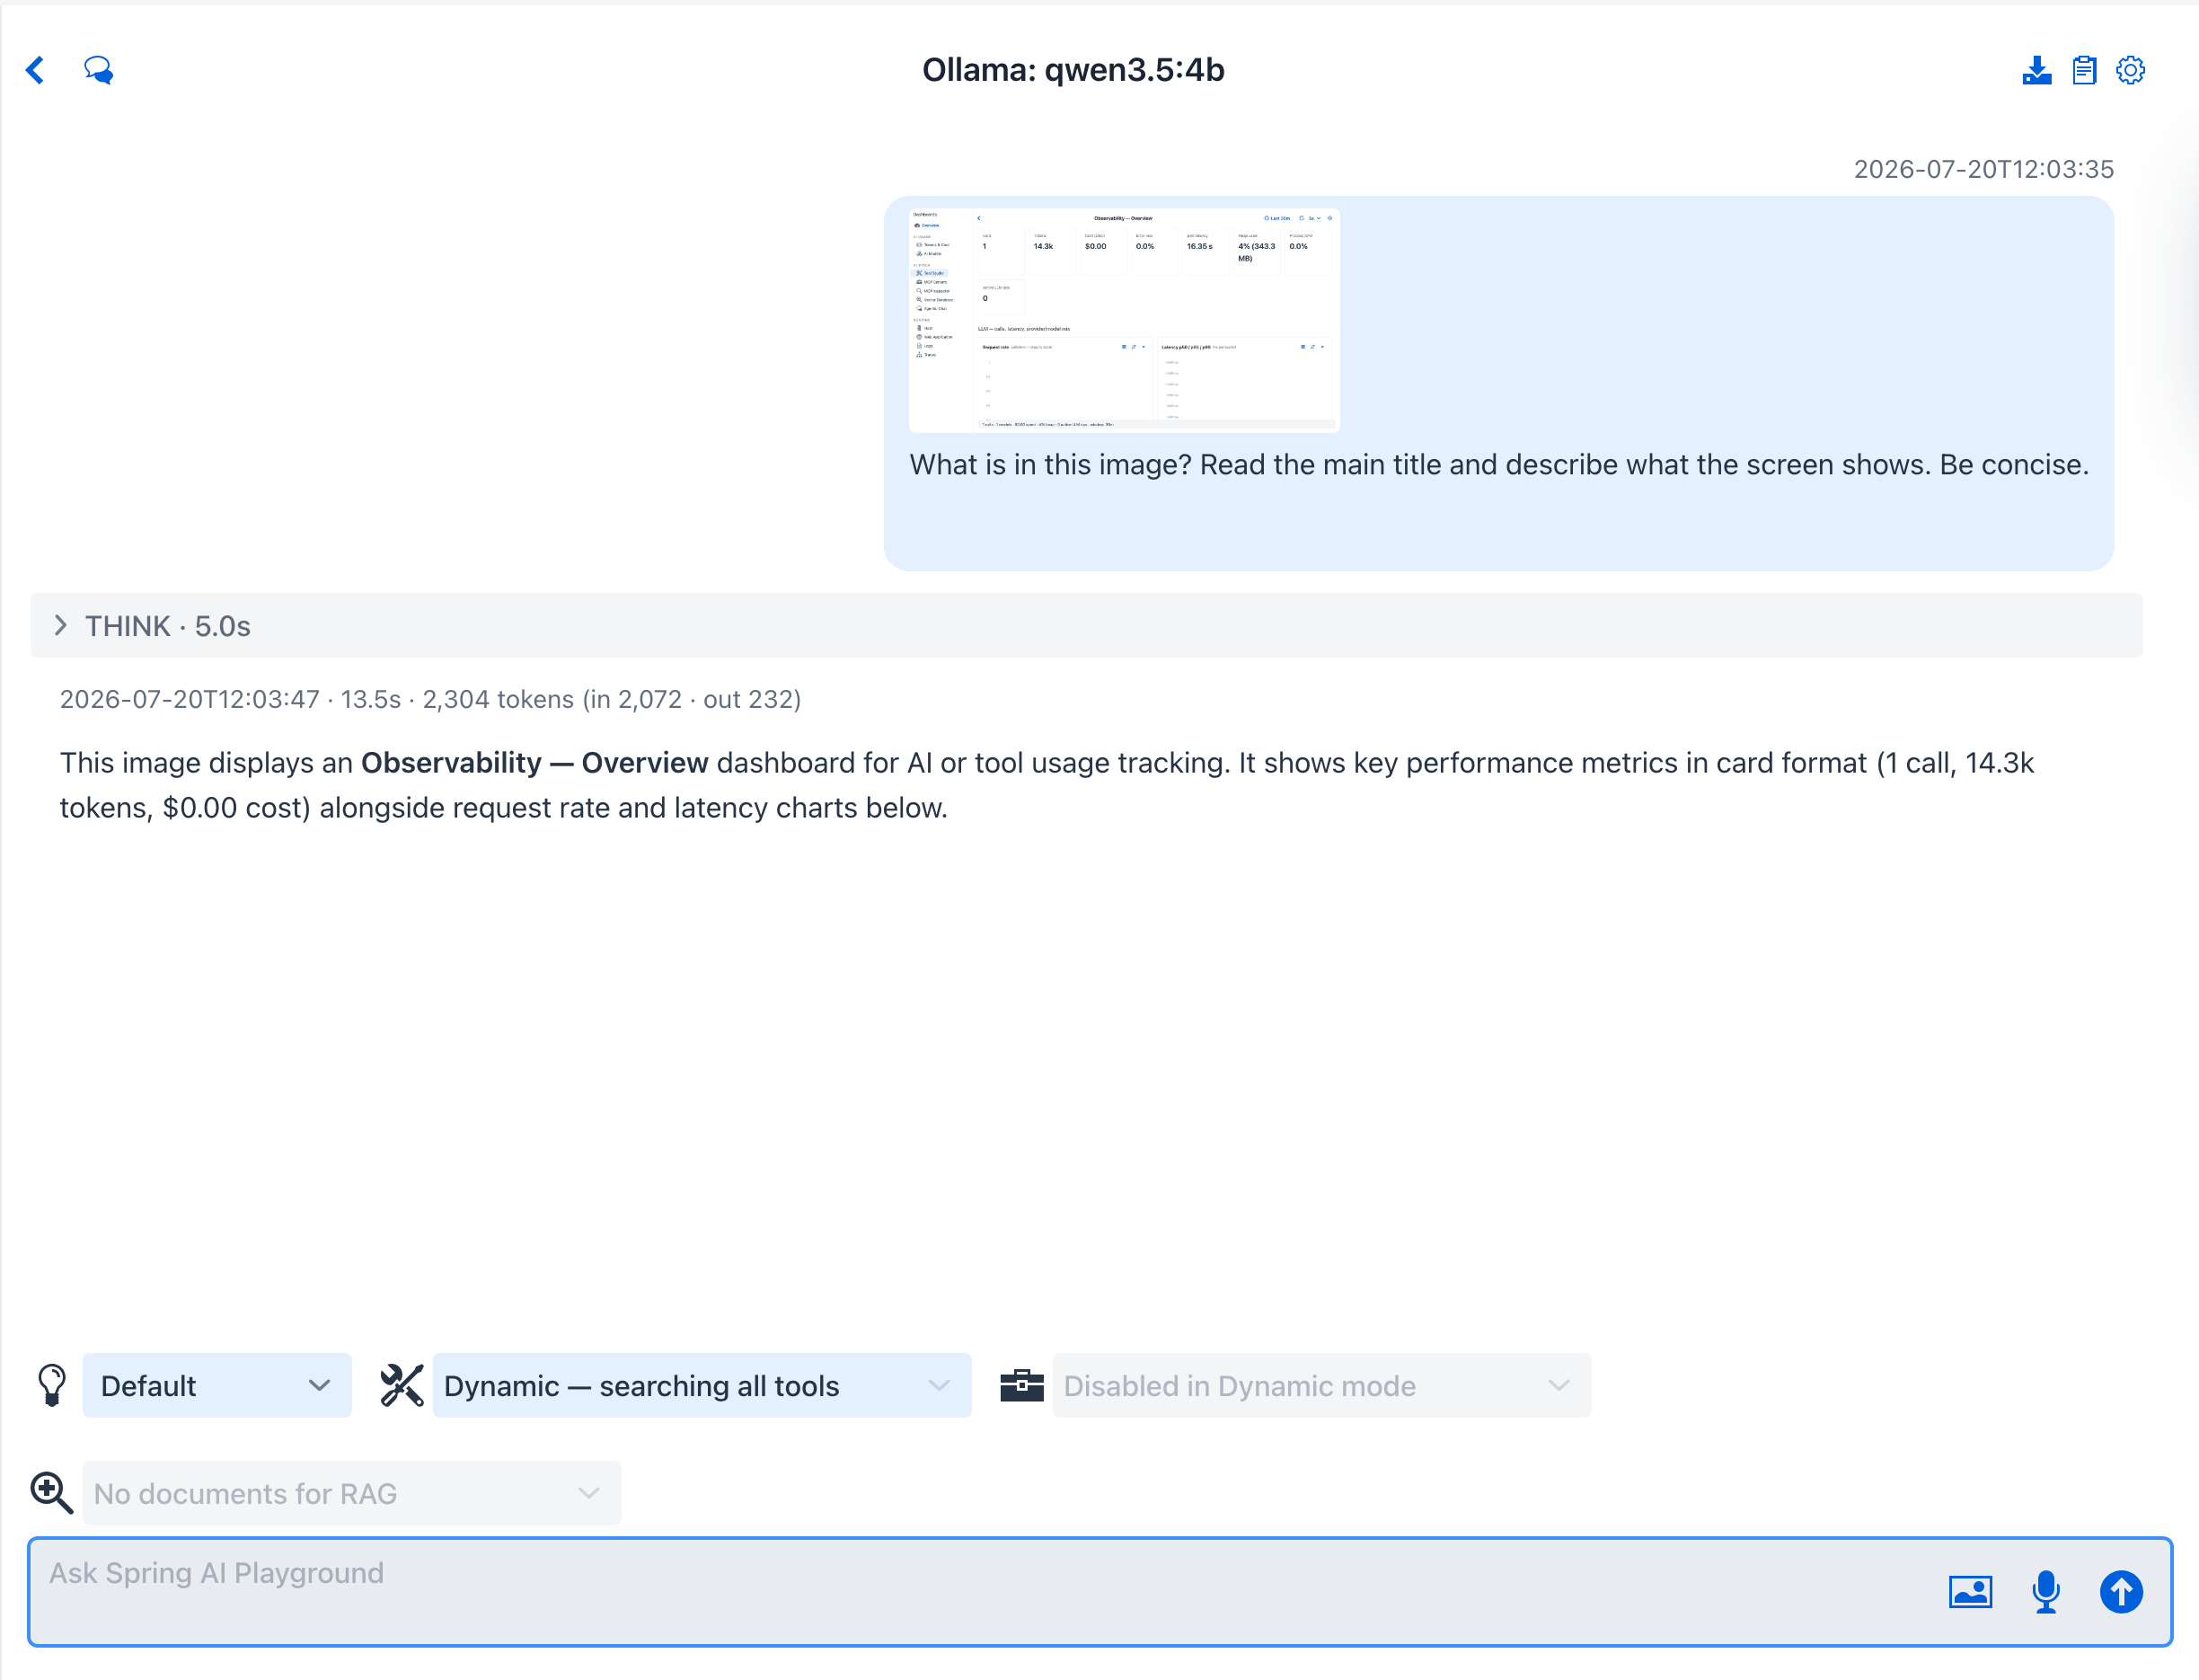 The answer is grounded in the attached image, not a guess - here the model reads the exact title text and identifies what the map plots. The thumbnail stays with the conversation - reopen the chat later and it is restored from the local image store.
- Photos carry more than pixels. The EXIF captured at attach time (capture date, camera, GPS) lands in a
.jsonsidecar next to each stored image, and the filesystem tools can read it. Apply the Image analyst preset from the Prompt Library (confirm the Apply preset tools dialog - it exposeslistDir,readTextFile,renderTable, andplotPointsOnMapalongsidedescribeImage), attach a few geotagged photos, and ask:Where and when did I take these three photos? Read each photo's EXIF sidecar, show a table with file name, capture time, camera, and GPS coordinates, then plot the three locations on a map.
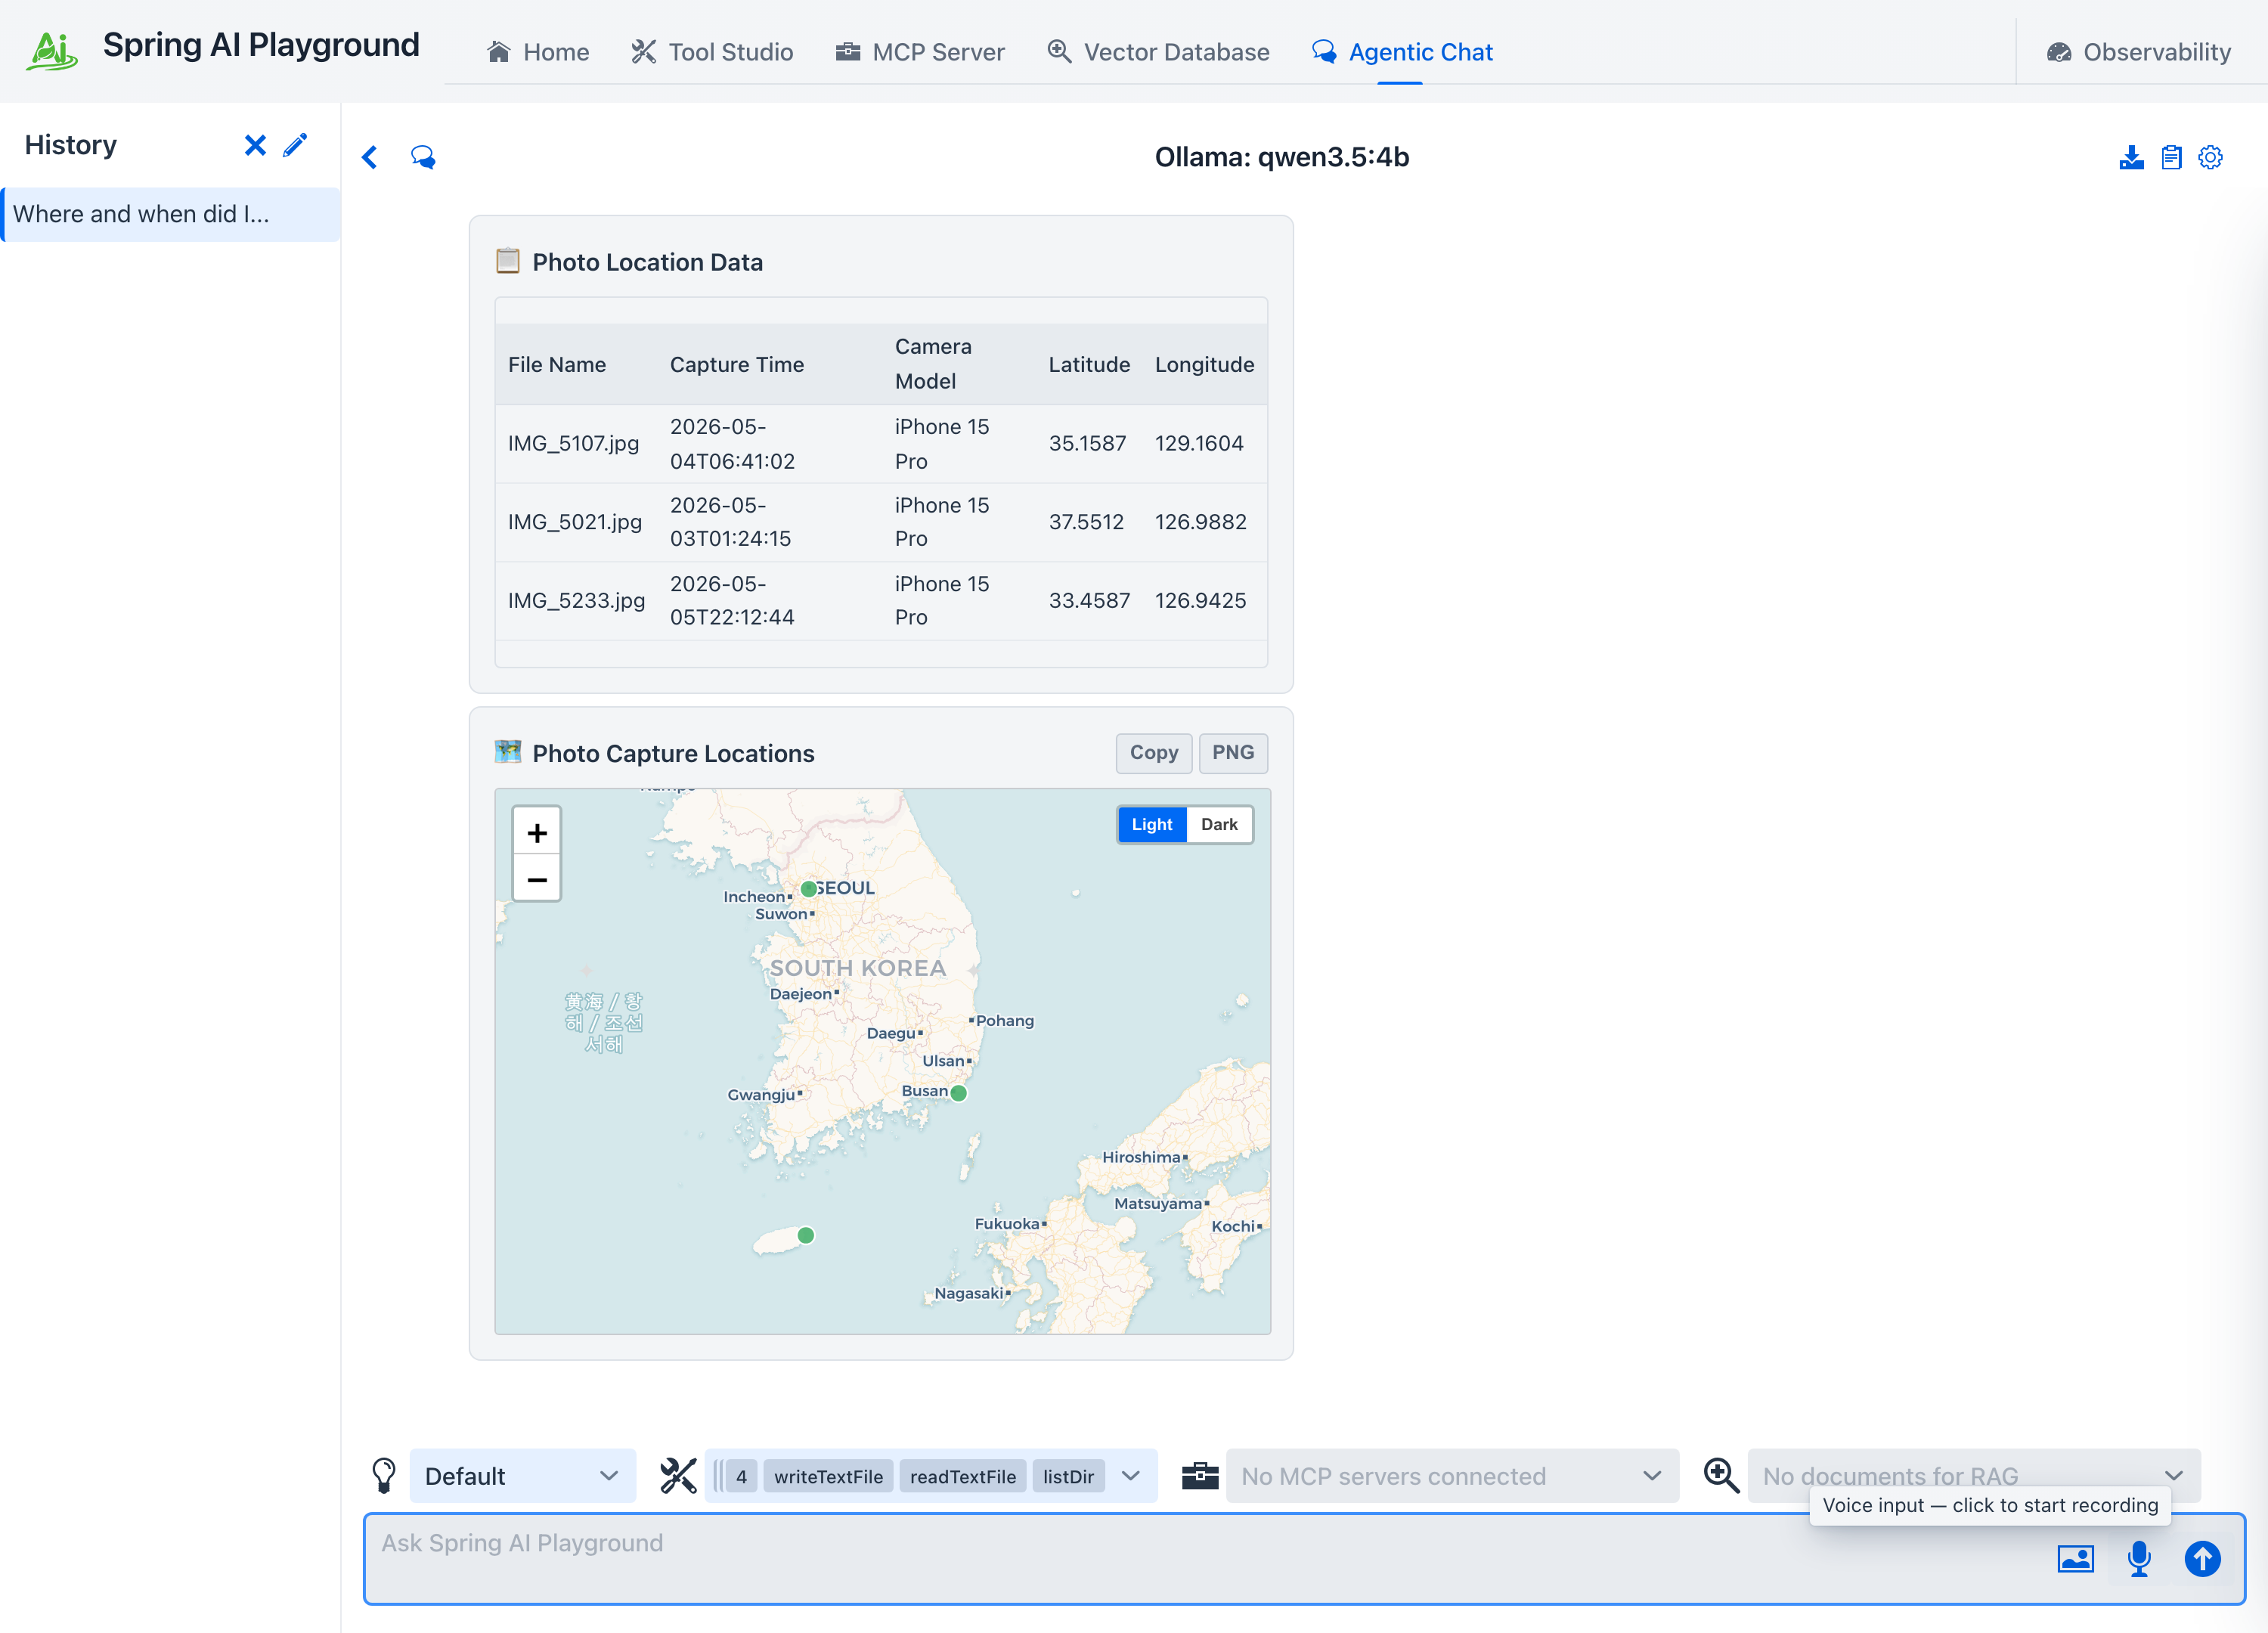 The agent lists
 images/, reads each <hash>.json sidecar with readTextFile, tabulates file, capture time, camera, and GPS per photo with renderTable, then drops one marker per photo with plotPointsOnMap - three shots, three markers. The answer ends in a table and a map you can read at a glance, not a paragraph of coordinates.
- Later in the conversation - even after the original turn has scrolled out of the model's context window - ask about the image again:
What was in that image I sent earlier?. If thedescribeImagetool is exposed to the chat, the model calls it, the chat re-attaches the stored image, and the model answers with the pixels in front of it again.
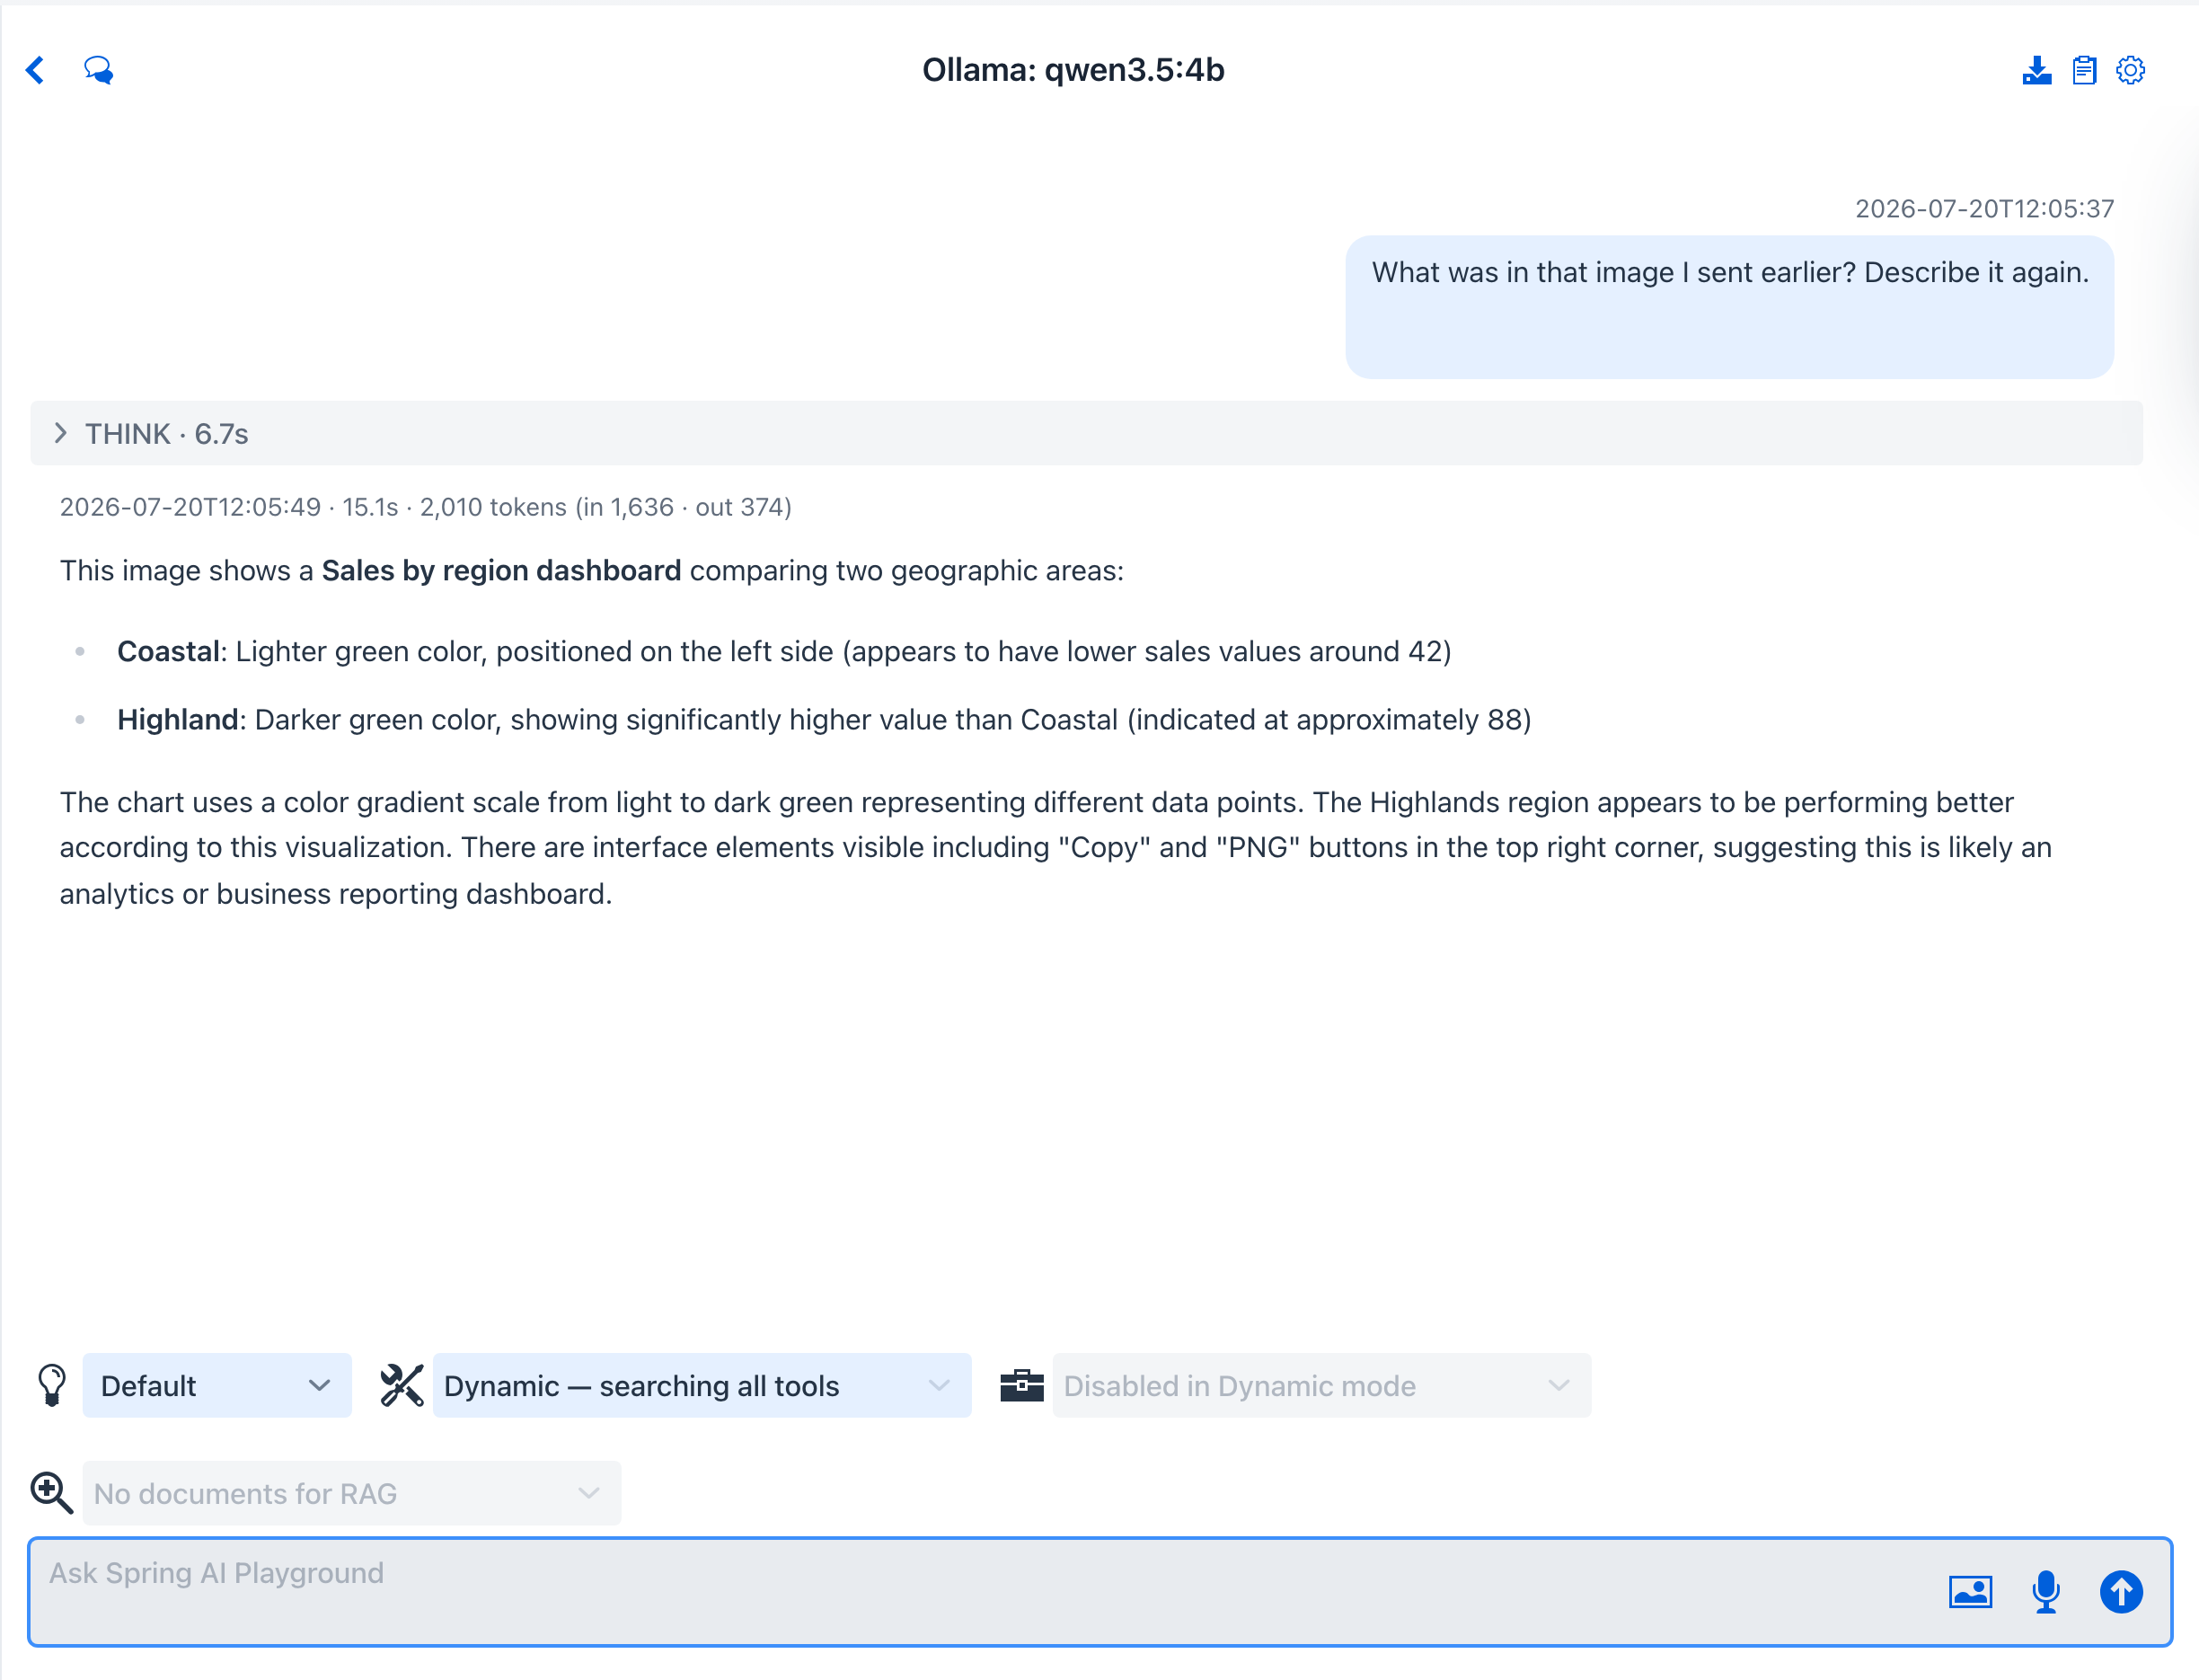 One image attached once, referenced any time -
 describeImage resolves by hash or file name. When several images match, a chooser lists each with a thumbnail and its short hash; when none exist, an upload dialog opens instead.
What to observe
- The browser does the heavy lifting before upload: EXIF (including GPS, capture time, camera) is read from the original file, then the image is rotation-corrected and resized to at most 2048px on its longest edge.
- Storage is content-addressed and per-conversation: the same image attached twice lands at the same
workspace/<conversation>/images/<sha-256>path once. The.jsonsidecar keeps the original file name, MIME type, and EXIF. - That sidecar makes EXIF queryable data, not just provenance: it sits inside the conversation workspace, so the same filesystem tools that read uploaded files turn camera metadata into
renderTablerows andplotPointsOnMapmarkers - no vision call needed for the where and when. - The vision capability check runs at attach time: a non-vision model (or an mlx false-positive) gets a warning, but you can still send - the provider error is translated into an actionable message if it fails.
- Conversation files persist only image references; reopening the chat reloads thumbnails from the local store.
Why this matters
Screenshots, photos of whiteboards, receipts, charts - much of what you want an agent to work with is not text. Native image input plus describeImage re-referencing means one attachment keeps working across the whole conversation without re-uploading or burning context on re-sent pixels. And because EXIF lands as readable workspace data, the Image analyst preset turns a batch of vacation photos into a sortable table and a pin map in one question. The full feature reference is at Agentic Chat → Multimodal Vision Input.