Tutorial 15 - Investigate Documents with a Pipeline
Time 6 min · Difficulty ★★☆ · Surfaces Agentic Chat
Goal
Point the agent at a document it has never seen and let it dig the facts out with filesystem primitives - the Unix pipeline way (find | grep -C | wc -l), one tool call per step. You apply the Document detective preset and ask about a contract you have not pasted; the model calls requestFileUpload, you pick the file, and the agent hunts the clause down with grepFile and sliceFile, quoting it back with exact line numbers.
Steps
-
Open Agentic Chat, click the Prompt Library (clipboard) icon, and apply the Document detective preset from the Presets group. When the Apply preset tools dialog appears, click Apply so the chat exposes the preset's twelve tools -
requestFileUploadplus the read pipeline (findFiles,searchInFiles,grepFile,sliceFile,lineCount, ...). -
Ask about a document you have not pasted - for example
I have a contract file. Find the late delivery penalty clause and quote it with its exact line numbers.The model realizes it cannot read what it does not have and callsrequestFileUpload- the chat opens an Upload a file dialog mid-conversation.
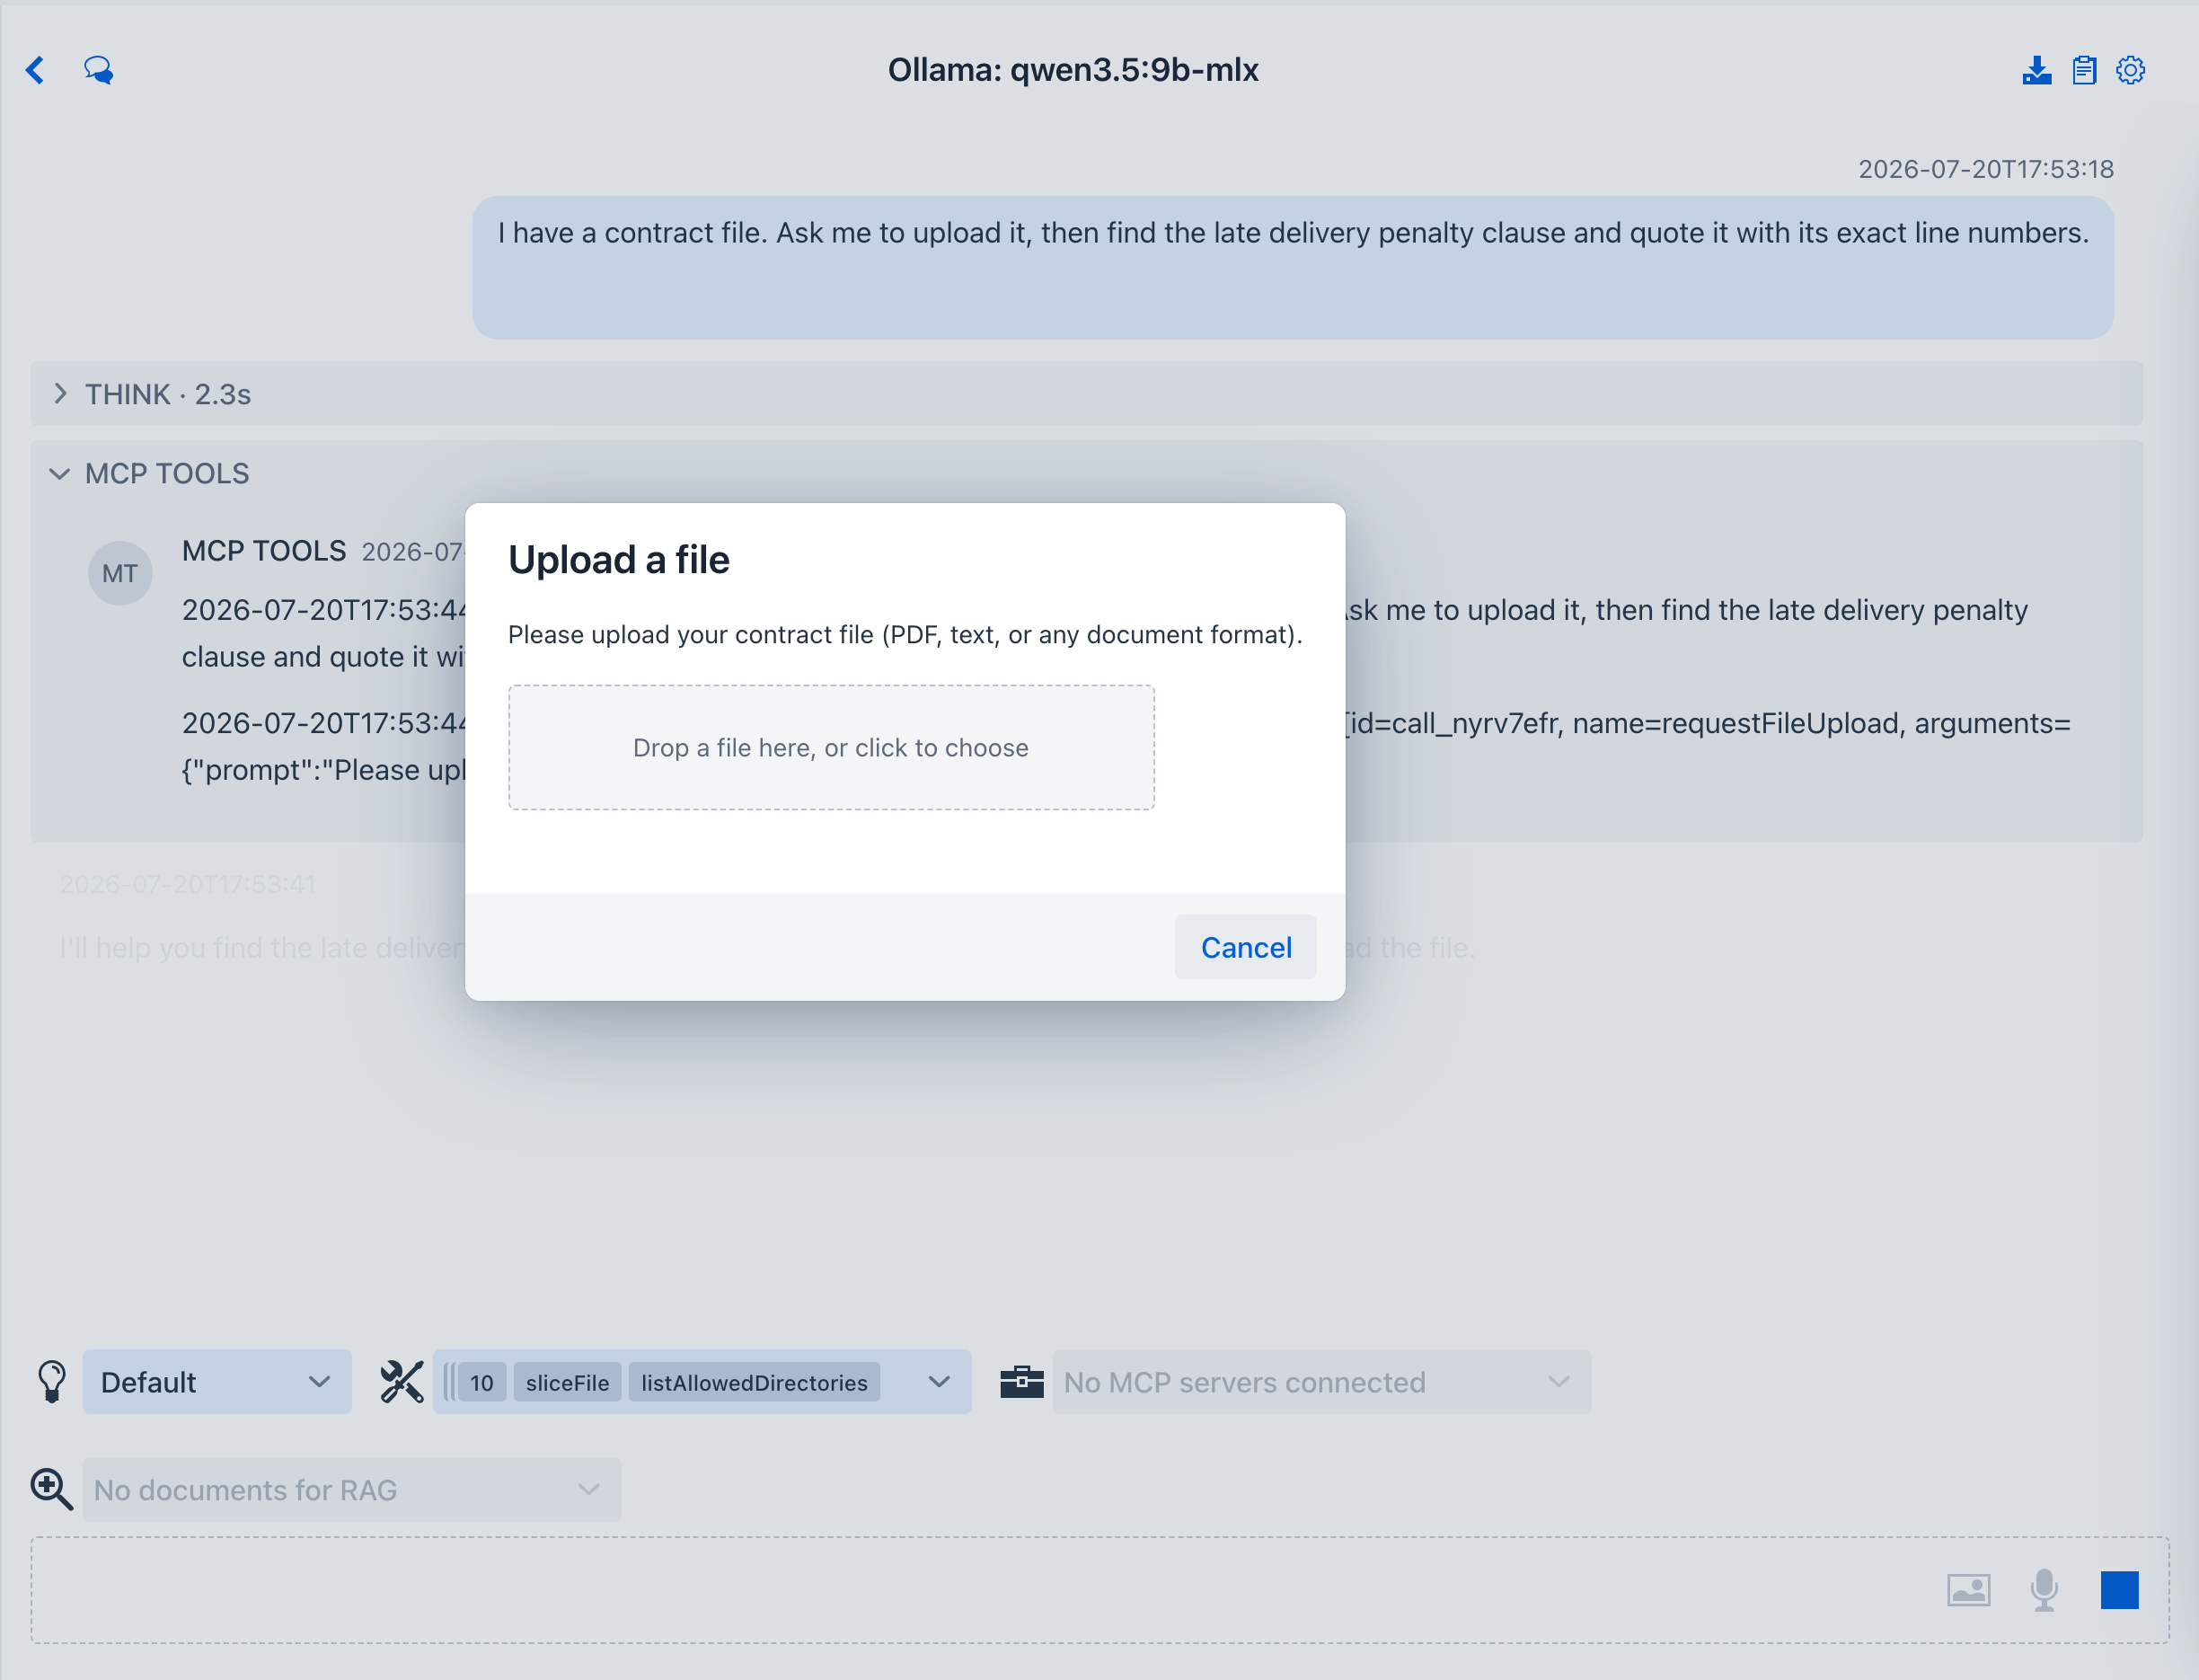 The same human-in-the-loop seam as tool approvals: the turn pauses until you hand over a file or cancel. Excel converts to CSV in the browser before anything is stored.
- Pick the file. It lands under the conversation workspace at
uploads/<name>and the tool returns that path to the model, which reads it and answers with the clause quoted at its exact line numbers - evidence, not paraphrase. The preset scales the tooling to the file: a small contract like this one is read whole withreadTextFile; on a large document it switches togrepFile numbered=trueto pin the matching line andsliceFileto pull a context window around it.
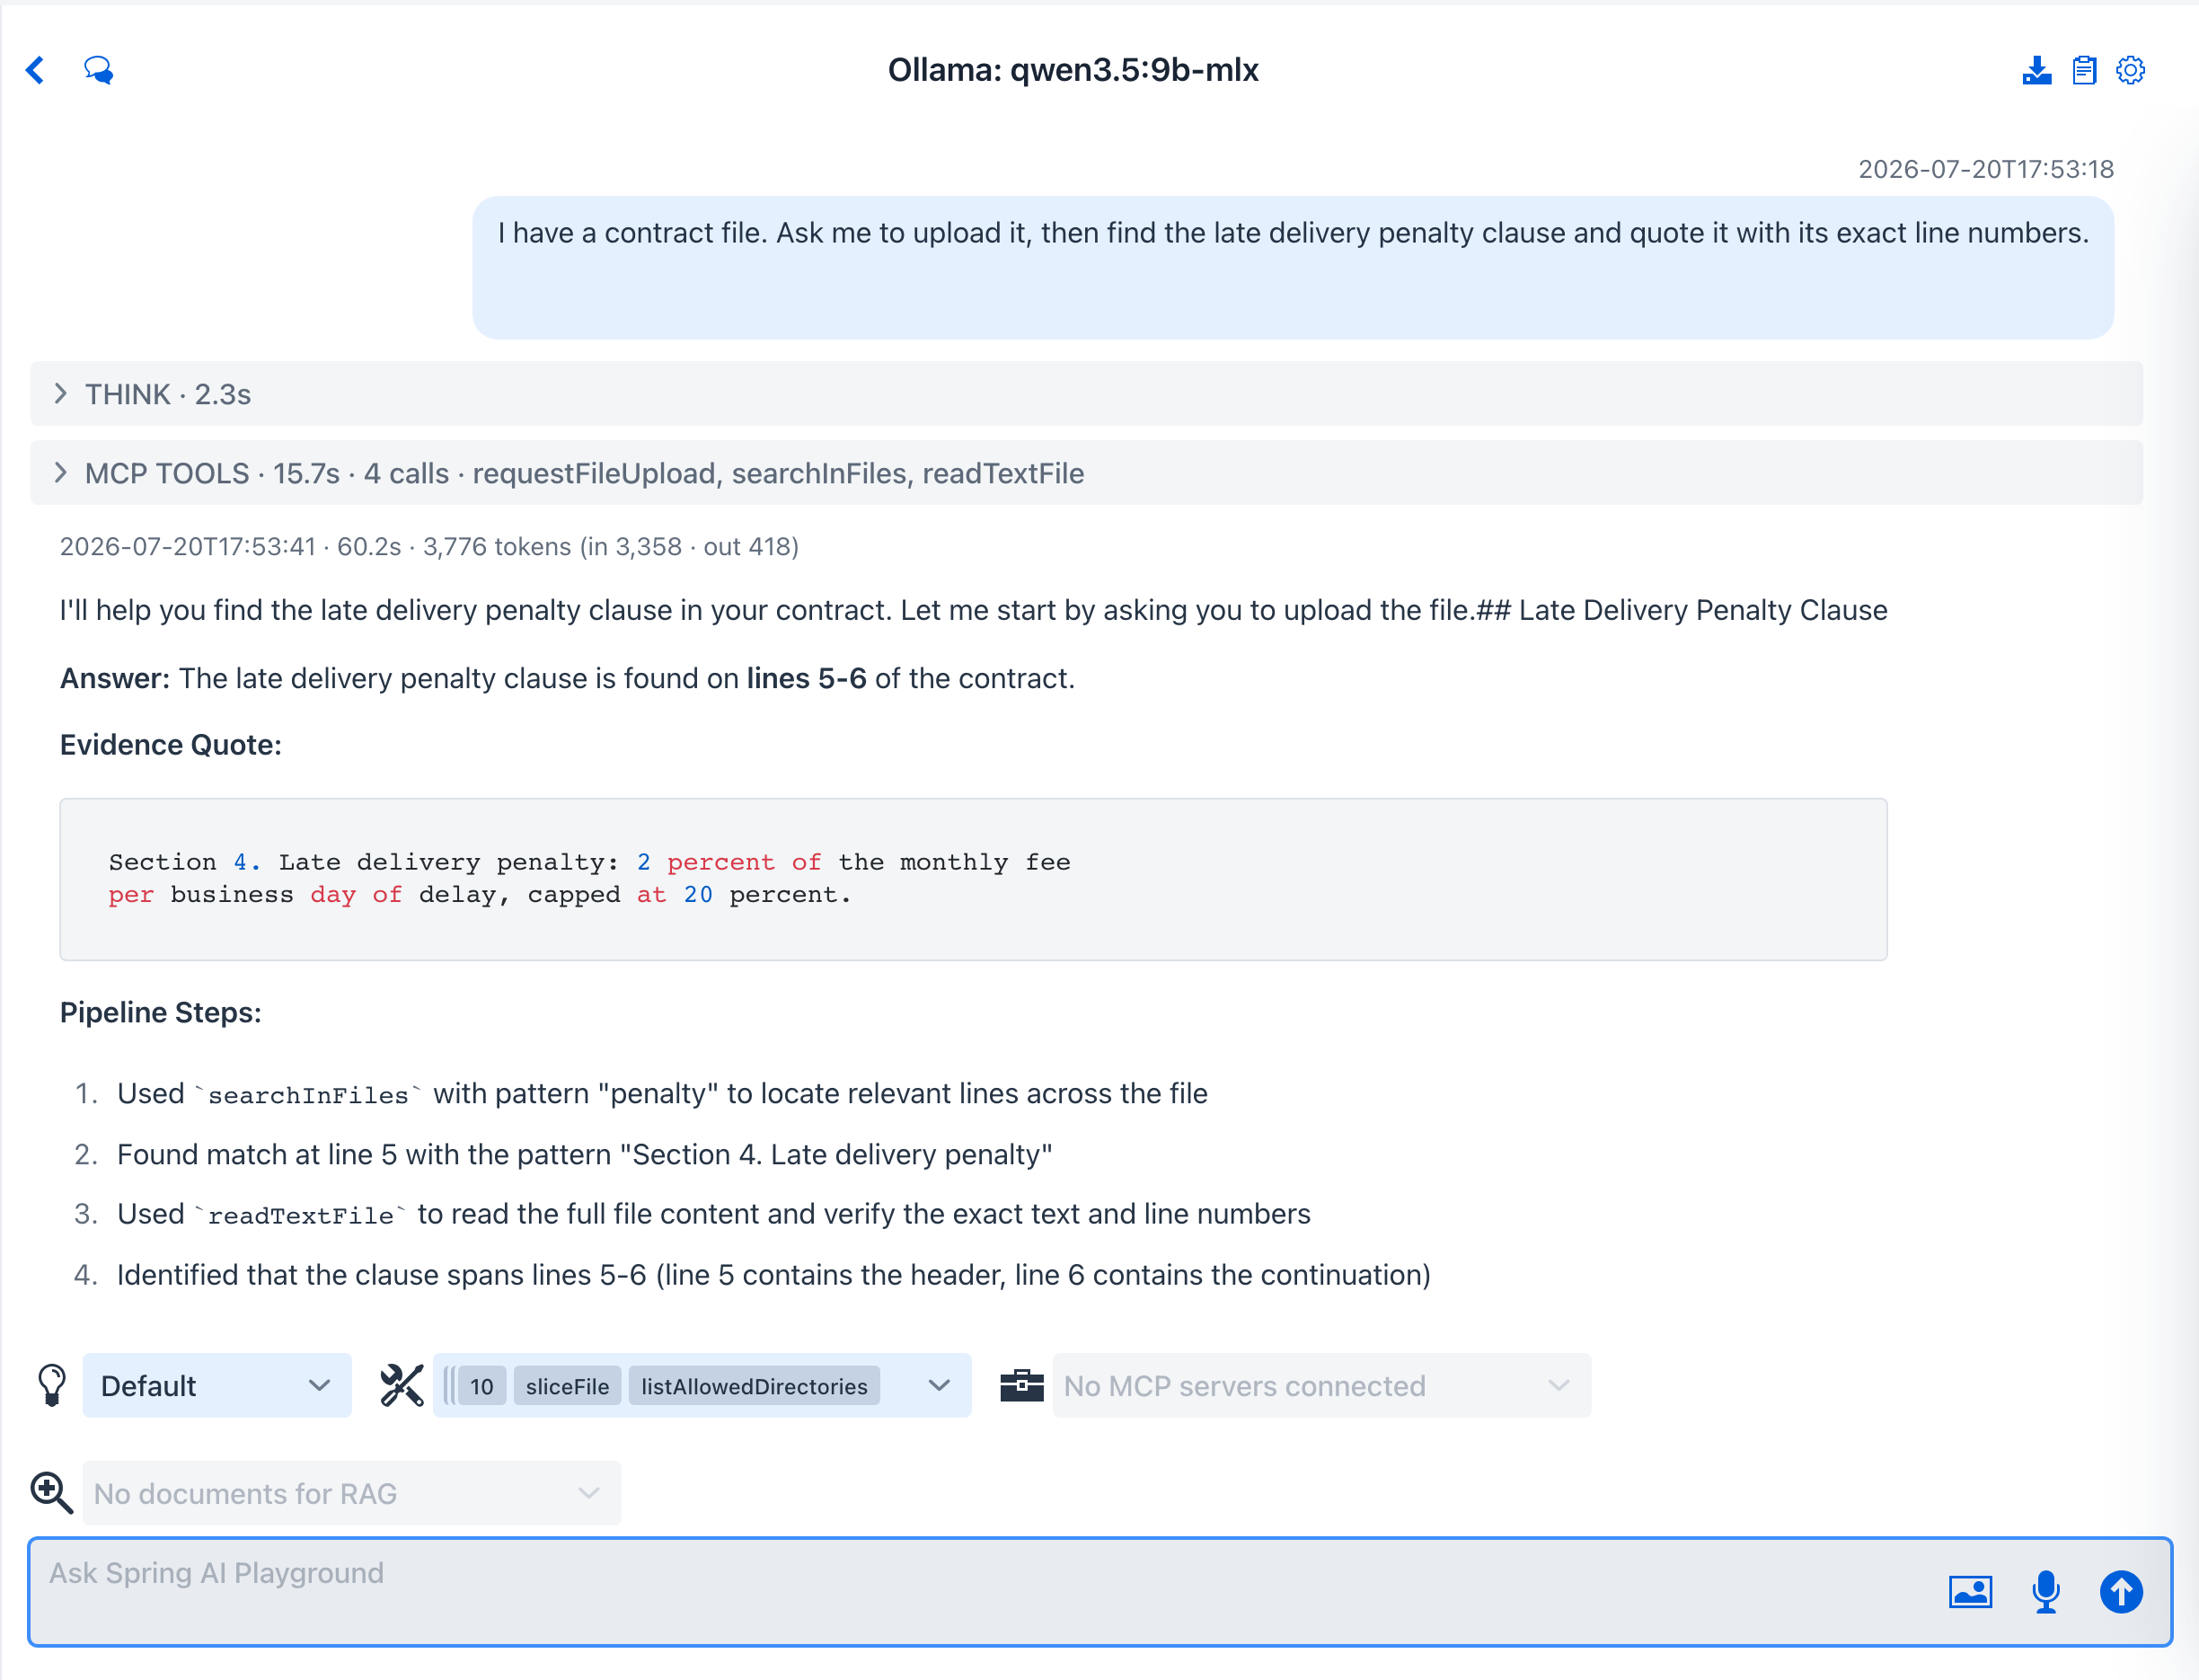 Every claim carries a verbatim quote and a line number - the
 grep -n discipline as an agent behavior - and the answer ends with the pipeline steps it ran.
- No upload needed when the documents are already on disk: give it a folder path instead -
Search every file under ~/contracts for the word "penalty"- and the agent sweeps it withfindFiles+searchInFiles, then slices context around each hit, exactly like the preset card's captured run.
What to observe
- The upload is saved under the conversation workspace (
workspace/<conversationId>/uploads/) - each chat keeps its own files, and deleting the conversation removes them. - The pipeline idiom maps one-to-one:
findFiles=find,grepFile numbered=true=grep -n,sliceFile=sed -n 'a,bp',lineCount=wc -l,sortFile/cutFileFields=sort/cut. - Everything here is read-only (
L3) - unlike the write tools in Tutorial 13, no approval prompt is needed to search and quote. - Excel (
.xlsx/.xls) converts to CSV in the browser before upload; the server only ever stores text.
Why this matters
Contracts, reports, exports, logs from another machine - most real documents are files, not paste-able text. The upload dialog plus the read pipeline turns "let me summarize what I think it says" into "line 5 says exactly this", with the evidence trail to prove it. The full preset reference is at Prompt Presets → Document detective.